Skip to main contentGetting Started with Blocklist Management
To manage your blocklist, follow these steps:
1. Access the Blocklist Section
- Log in to your account dashboard.
- Navigate to the “Inbound” section.
- Click on your domain.
- Click on “Blocklist”.
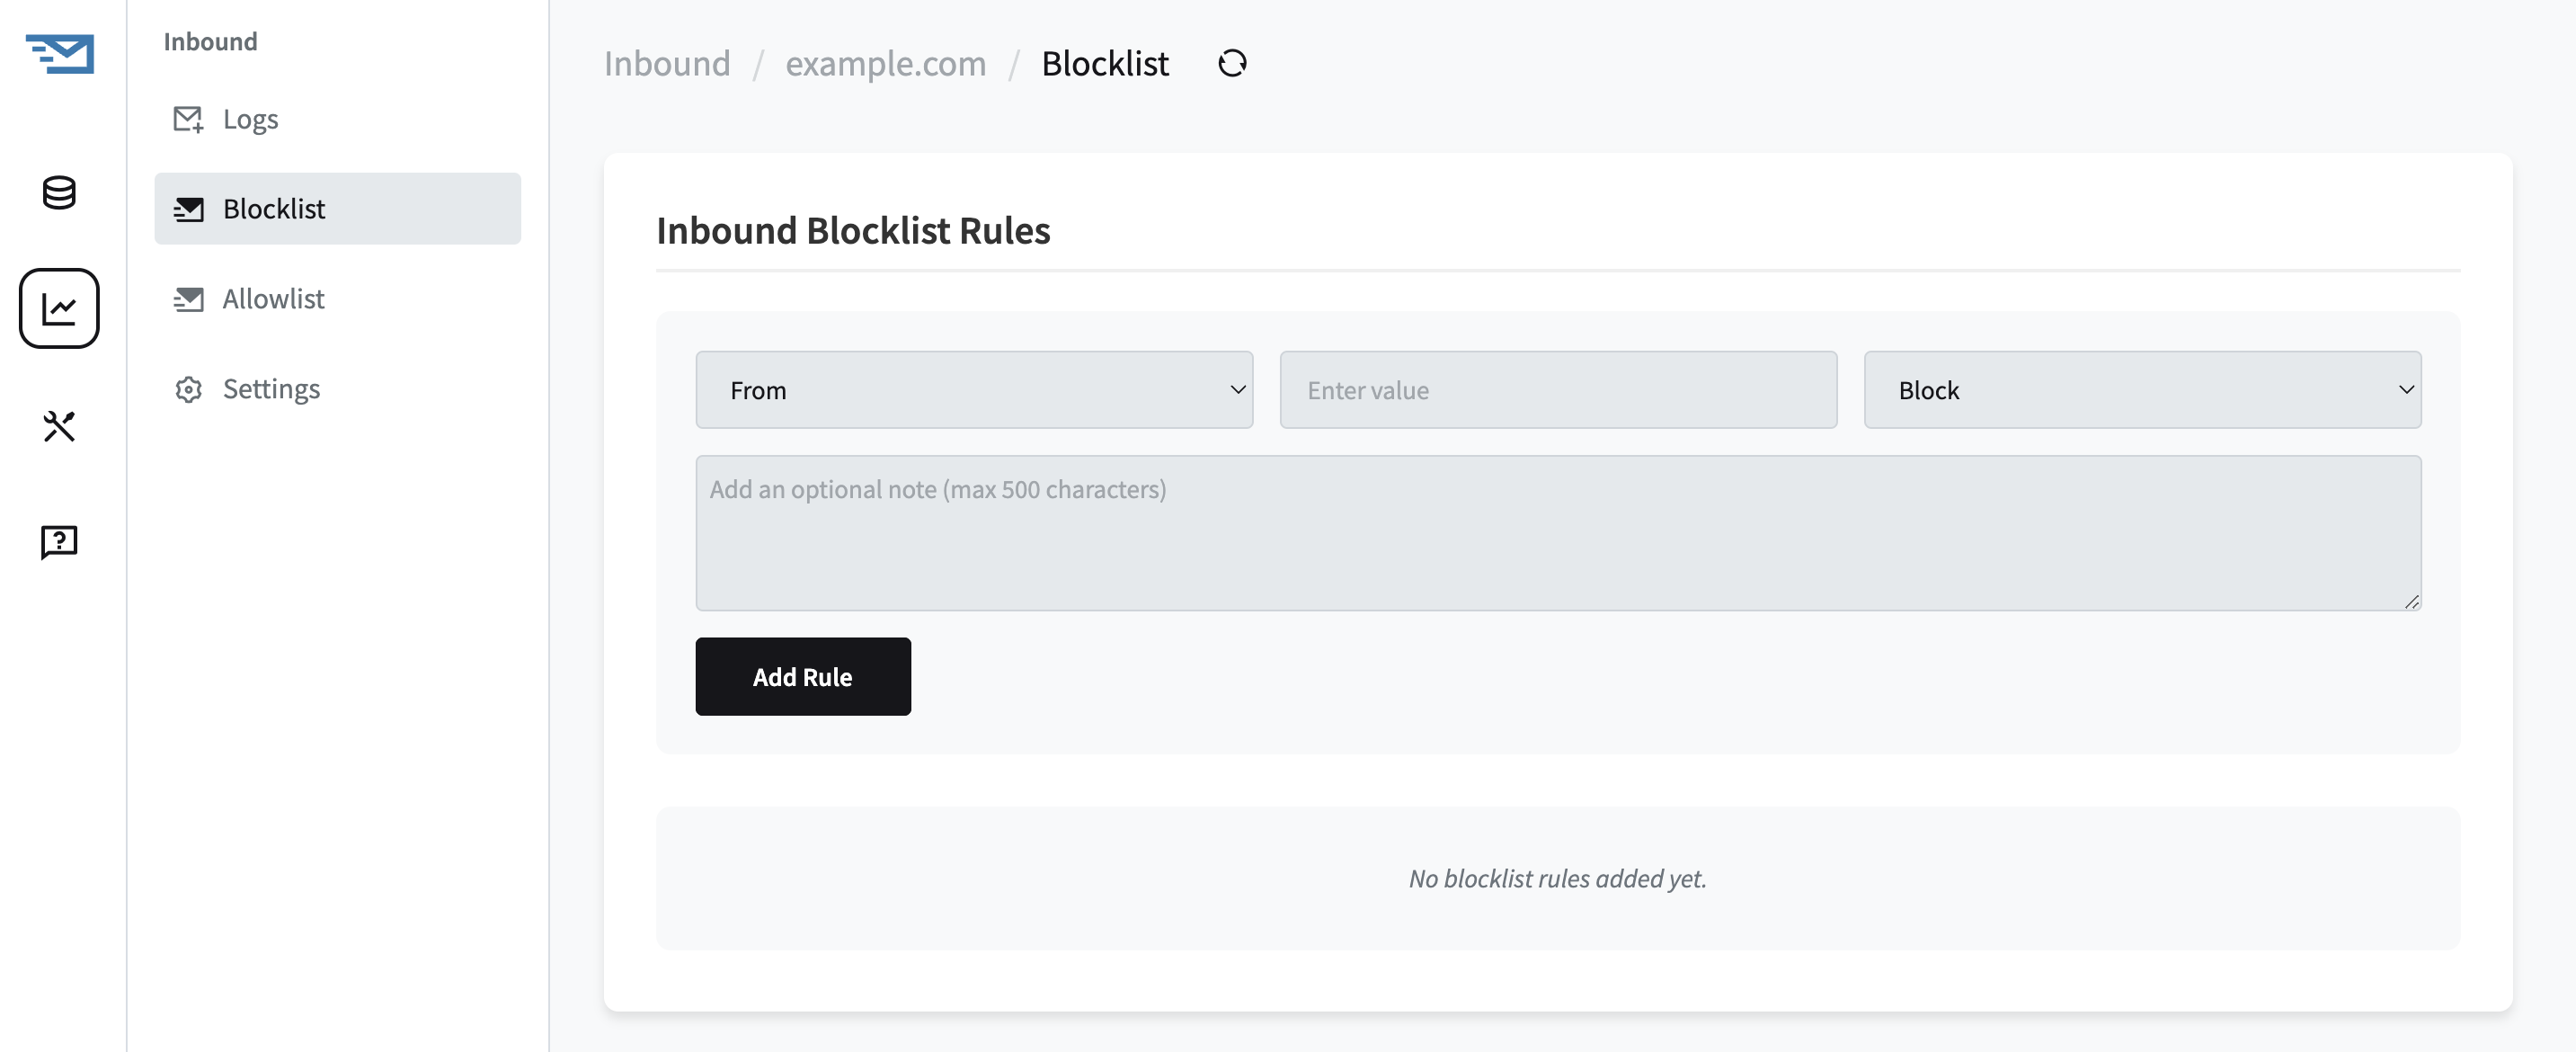
2. View and Manage Blocklist Entries
- In the Blocklist section, you will see a list of currently blocked email addresses and domains.
- To add a new entry, click on “Add New Blocklist Entry”.
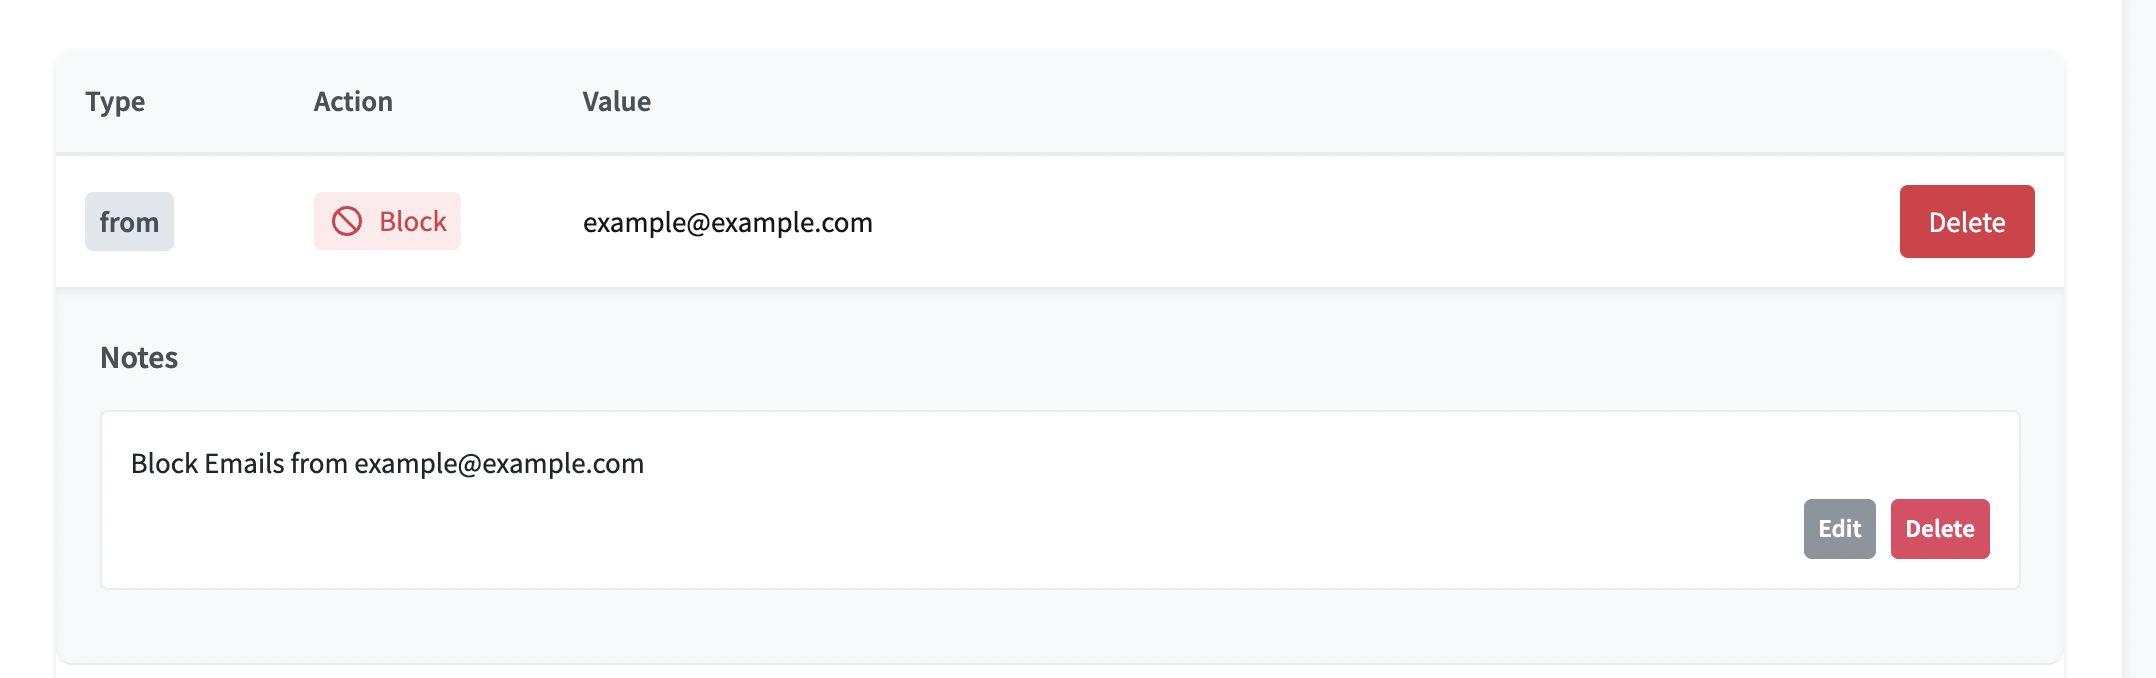
3. Create Blocklist Rules
Find detailed instructions on how to create blocklist rules here.
Once these steps are completed, emails from the specified addresses or domains will be blocked before reaching your server.